Viaim Recdot in Brana Dane's ear

Viaim RecDot Wireless Ear Buds Review: Audio Recording with AI Processing

Wireless earbuds for listening to audio and using video conferencing software are very common these days. It seems like every tech company makes a variety of wireless earbuds in various price ranges as accessories for you to buy. So it’s kind of hard to differentiate.  While something like the Angry Miao Cyberblades brings in a flashy Chroma flair paint job and extra low latency radio frequencies, Viaim is differentiating with some new functionality.

The Viaim RecDot aims to grab your attention with something potentially very useful; on-device audio recording, and cloud-subscription AI driven transcription.

Buy on Amazon

Buy on Viaim.ai

Specifications

The Viaim RecDot supports high quality Bluetooth 5.2 + Dual-Device Pairing with Hi-Res certified audio and 48db active noise cancellation.  The earbuds should last for 9 hours of continuous use and the charging case can extend that to about 36 hours of non-continuous use.  A 5 minute charge should get another 1 hour of use. The earbuds weigh 4.90g each and the Charging Case weighs 52g. Each earbud also includes enough flash storage for about 69 minutes of audio recording even when not connected to a phone. 

What’s in the Box

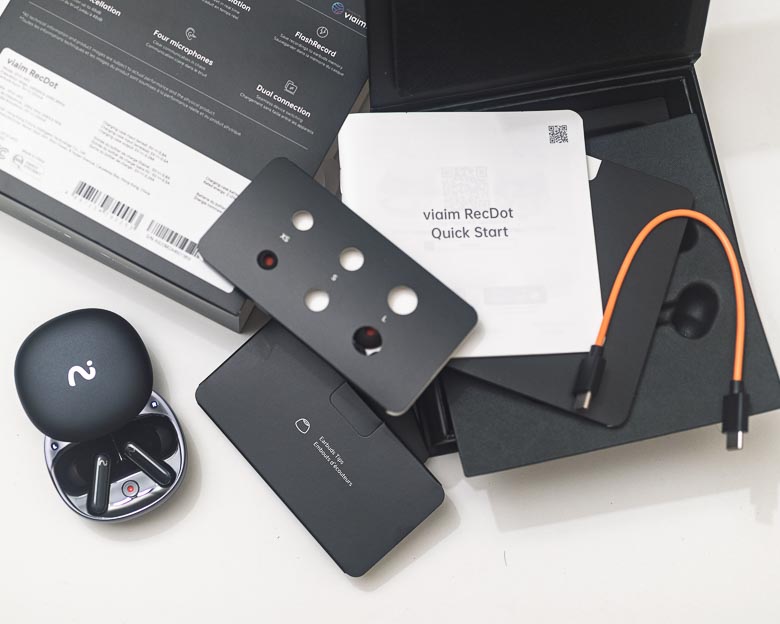
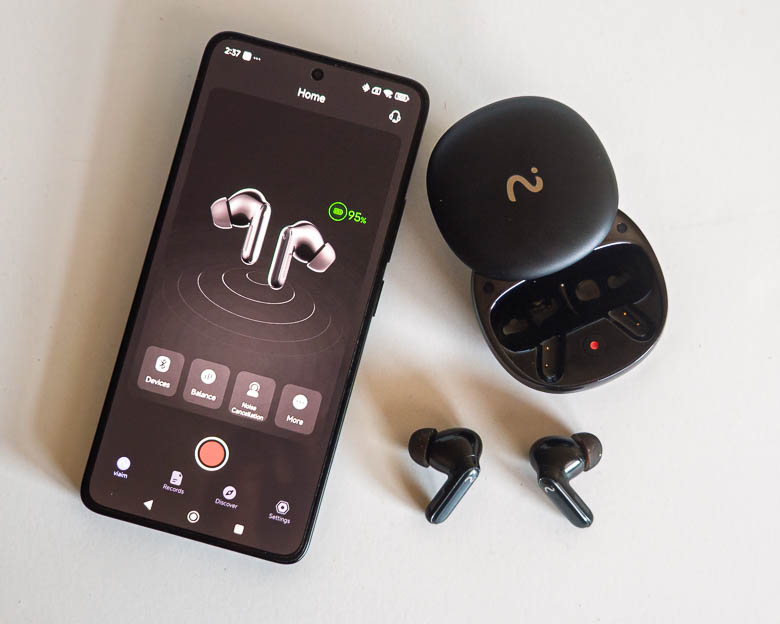
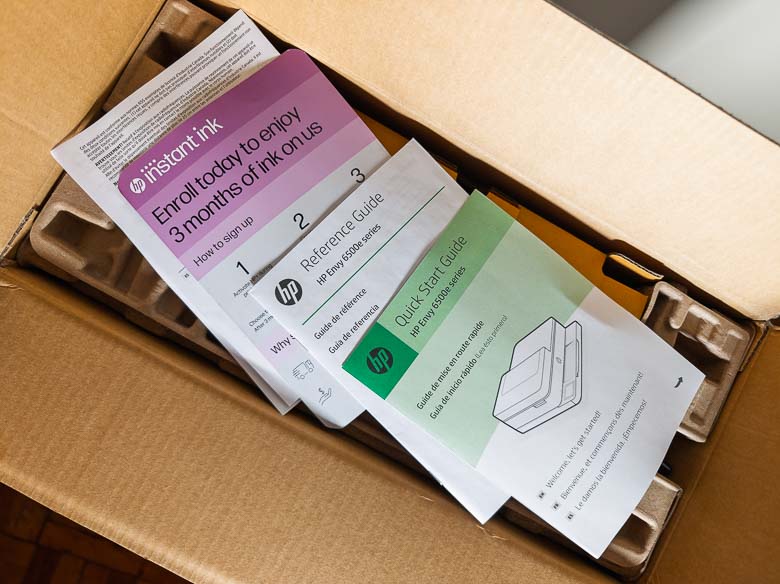
In the box you get the earbuds, the charging case, some printed documentation, a short orange USB-C to USB-C charging cable, and a set of rubber ear inserts that you can swap out for different sized ears.

Hardware

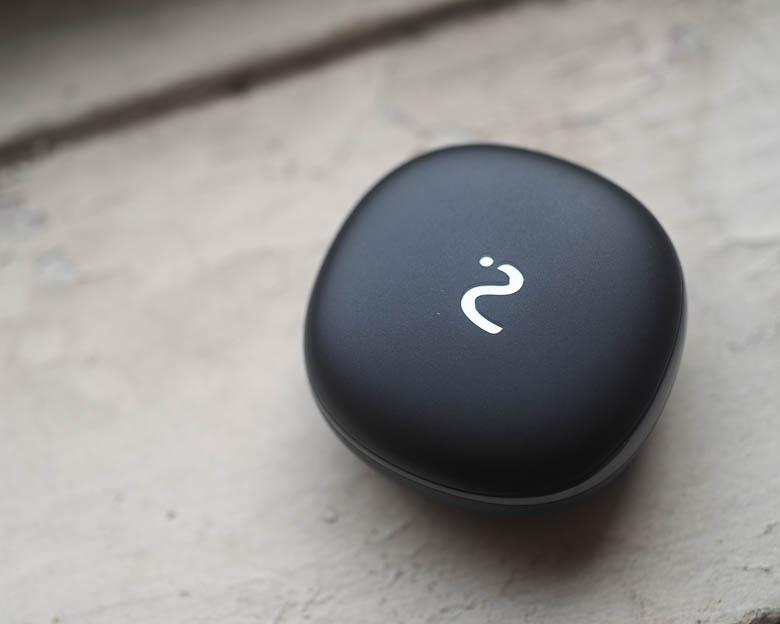
Like many earbud charging cases, the design is very smooth with rounded corners like a polished stone. It’s feels extremely ergonomic in the hand. There’s a very discreet hidden button next to the USB-C port for initiating pairing mode. 

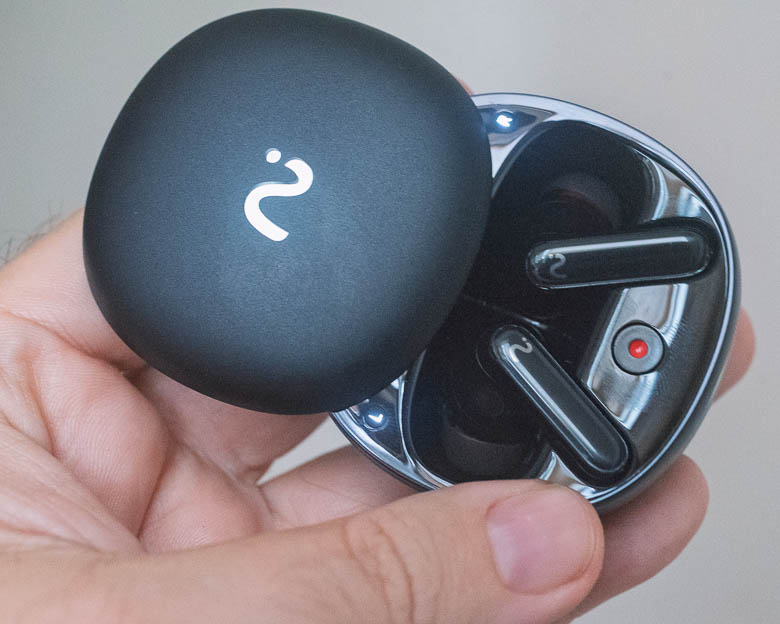
The charging case is honestly a bit difficult to figure out how to open. Is it a clamshell hatch that opens with a hinge somehow?  Nope!  You have to slide one side in the correct direction and there are no visual indicators on the case that would communicate which direction you have to slide in order to open it.

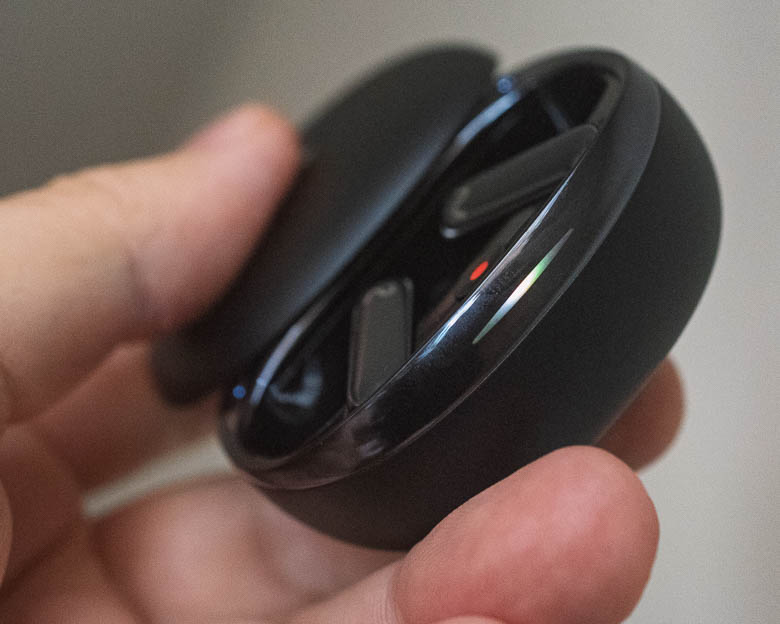
It turns out, you have to slide it away from the LED indicator light which is on the opposite side of the USB-C charging port on the charging case.  The indicator light is completely invisible when it’s not lit as it integrates seamlessly with the case’s shiny plastic rim. This is great for looks, but not great for usability.  When the light does go on, the different colors and blinking patterns may indicate things like charging process, pairing mode, powering on, etc. It does not seem to indicate when the earbuds are recording audio though. 

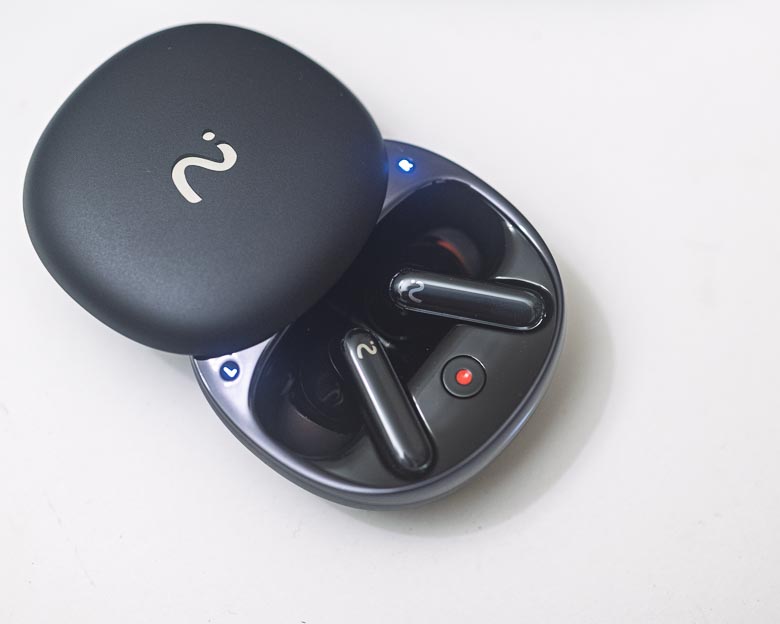
When the case is open though, there are two more “L” and “R” lights just above where the earbuds sit inside the case.  There’s also a red circular dot button, the “recDot”, which you can use to start and stop recording audio in the memory of the earbuds.  When you press that, either the L or R light will start blinking and THAT’s the indicator that they are recording audio.  

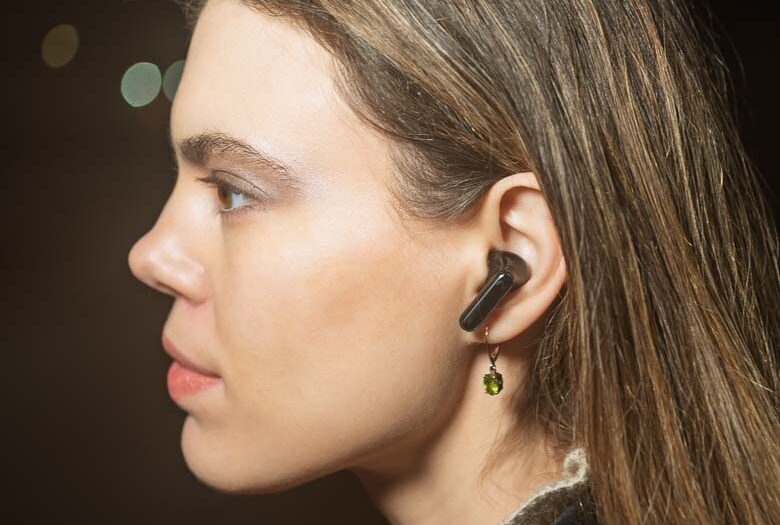
The earbuds themselves are very similar to most other wireless earbuds these days. They’re very lightweight and comfortable with variously sized rubber ear inserts for the perfect fit.

The audio quality is great too as the earbuds support Hi-Res audio codecs over Bluetooth 5.2. 

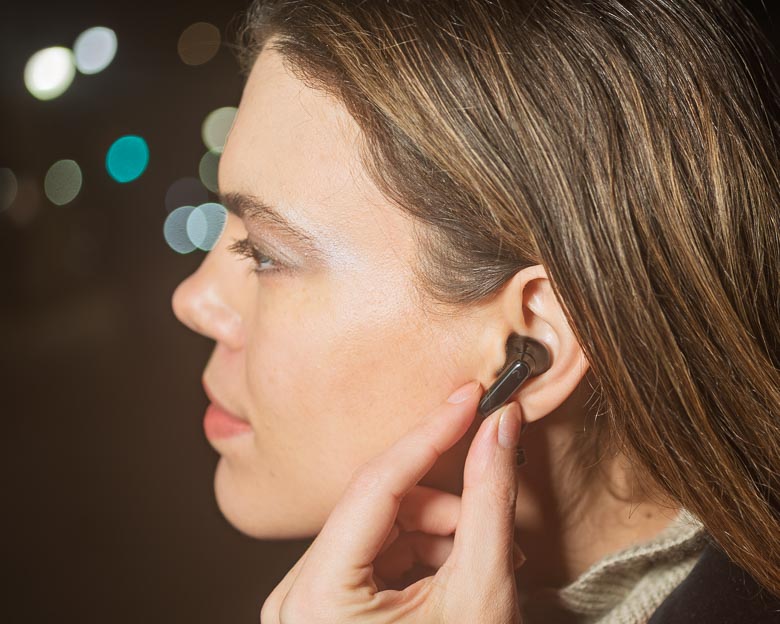
When the earbuds are actually in your ear, there are some nice “pinch” based controls.  I much prefer pinch controls over press controls because pressing the earbud into your ear is something I do a lot when I’m afraid one might fall out. If that “press” can also activate something like pausing the music, that can be very annoying. Thankfully the Viaim RecDot earbuds have their control button on the tail of the earbuds on the front area where you can simply pinch the tail to activate.  A single press will pause/play, a double pinch will go to the next track, and a pinch & hold will start recording audio. All earbuds should have this type of interface.

Voice command controls are also available, but the “always listening” mode my run your battery down quicker than you’ll like so this can be disabled in the settings.

Software

You’re going to need to download and install the Viaim app in order to do anything other than the standard Bluetooth audio and phone call features of these earbuds. The software isn’t available on macOS or Windows either, so you’re going to need to us an Android or iOS device, too. 

The software has a lot of functionality. You can customize the earbud pinch button controls, you can change the noise cancellation modes, you can update the firmware, change equalization settings, etc.  There are also up-sell advertising for AI transcription subscriptions that give you more features than the free option. The basic free plan gives you 600 minutes of transcription per month, which is pretty good.

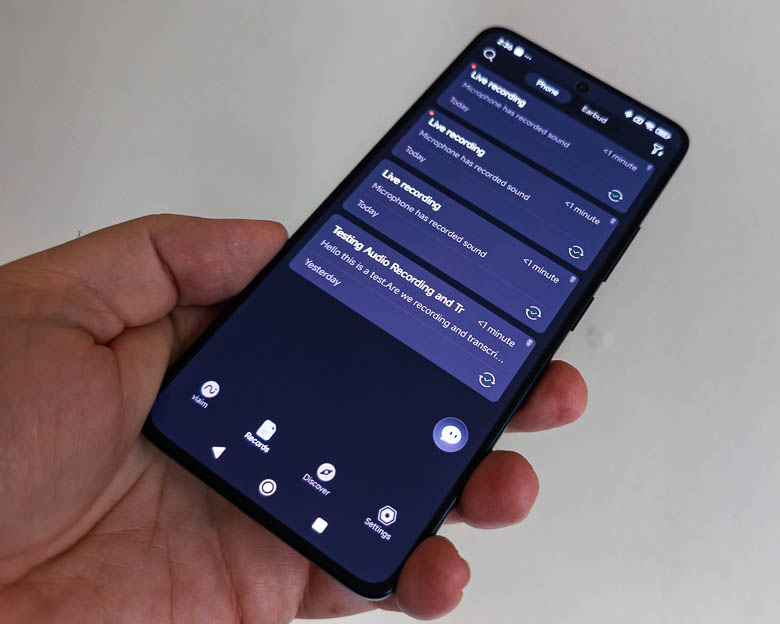
You can use the software to copy recordings from the earbuds onto the phone and then you can use the phone app to upload the audio to Viaim’s cloud service which will then transcribe the audio. It can understand multiple languages as well. There’s also a “translate” button hidden deep in the menus for each recording which you can use to translate the transcription into different languages.  Unfortunately, it didn’t work well for my test in French. I was expecting some live in-ear language translation capabilities, but that does not seem to be the case. For live translation, you have to initiate the recording from the app on your phone. It can’t do live translation from the earbud recording button or charging case recording button. Still, there are some other great features as well such as automatic title generation and multiple speaker labelling so you can very easily tell what the conversation subject was about as well as who was saying what. 

There’s an AI chatbot within the software which lets you process or query the audio recordings on your device. For example, you can ask questions that may have answers in the transcriptions or you can ask for summaries of a specific person’s point of view. 

The app itself can also do the audio recording but the recording button isn’t available unless you’re connected to the earbuds via Bluetooth. In fact, you’ll have to use the app’s recording button if you want to record video conferencing or telephone call audio.  You’ll also have to use the app’s record button directly if you want to enable live transcription and/or translation. It’s kind of annoying that the record button on the earbuds doesn’t record in-ear audio coming through Bluetooth. Only the app can do that.  

Pros/Cons

Pros

  • Audio recording capabilities
  • Active Noise Cancellation & Transparency mode
  • Excellent audio quality
  • Pinch activated controls
  • Connects to 2 devices at the same time
  • Software on phone includes AI driven transcription and translation services

Cons

  • Software transcription/translation requires creating an account and may require a fee after exceeding the free limits
  • Telephone, Video call recording needs to be initiated from the app (hardware button recording only uses the earbud microphone.)
  • Record button on charging case does nothing if the earbuds are not in the case
  • Translation requires looking at the phone (no in-ear live translation)

Pricing

The Viaim RecDot wireless AI recording earbuds cost about $199 on the Viaim web store

Conclusion

Viaim’s addition of voice recording to wireless earbuds certainly is a big innovative differentiator from other earbuds who are competing on basics like sound quality, battery life, and prices. The Viaim RecDot earbuds have a clear value proposition with their audio recording feature and transcription/translation software. The fact that they can record audio without the paired smartphone nearby is quite interesting. You could leave the earbuds with the charging case open in a secret hiding place and let them record conversations while you’re away, and then just download the audio recordings when you’re back within Bluetooth range. So as an illegal spy device, that’s kind of cool. As a device for recording business meetings, it may have its uses as well, but we could probably just us a regular smartphone with an audio recording app for that kind of situation too.  So while, this certainly is innovative and interesting, it’s hard to tell if it’s genuinely useful. 


Guest appearance by Supermodel Brana Dane.

OmniOne – Pocket PC’s are back!

I love it when electronic hardware manufacturers get innovative even if it’s already been done several times in the past. There’s a new Pocket PC or Ultra-Mobile PC or Mini-PC that’s gotten nicely funded over on Kickstarter. Traditionally, “Pocket PC” was Microsoft’s term for “Palm-sized PCs” running the Pocket PC operating system embedded on smartphone sized devices or PDAs (personal digital assistants) at around the turn of the century. This is a full Windows 11 computer packed into small pocket friendly hardware though. Around 2004 and 2006, we also had “Ultra-Mobile PC’s” which were small 5″ devices that ran full Windows as well.  See: Ultra-Mobile PC Wikipedia.

The OmniOne 5.7 is a similar Ultra-Mobile PC with a full Qwerty keyboard, 5.7″ touch screen, trackpad, Intel N150 processor, up to 1Tb storage, 16.34Wh battery, and loads of I/O ports such as 2 USB-C ports, HDMI, Display Port, 2 USB-A ports, and even a full Ethernet port. Wow!

Windows 11 is pre-installed, but you can put Linux or Windows 10 on it as well.  Personally, I think that user-experience design wise, the Windows 8 user interface was the best for this type of device, but we can’t have that anymore. 

The Kickstarter pricing varies from $400 to $690 depending on configuration. 

HP Envy 6552e Printer Review: a consumer all-in-one printer with instant ink

In my experience, printers have always been the most annoying tech product to deal with. The moving parts, managing the ink levels, loading paper, connecting computers, installing software drivers, getting the settings right. It’s always been a complicated affair. 

Does the HP Envy 6500 series make things easier?  Maybe a little.  Read on to see how the HP Envy 6500 series printer holds up. 

What’s in the Box

The packaging includes the printer, quick start guide, reference guide, 3-month ink supply subscription, power cable, and one spare ink cartridge.

The guide only shows information about plugging the printer into the wall and turning it on.  There’s nothing about loading paper or changing ink cartridges or connecting to the network really.  Only a bit about installing an app on your phone. Luckily the separate Reference Guide does include a couple pages about how to do those other things. 

Setup

After plugging in the printer, it comes on by itself and tells you to go to a website by scanning the QR code or typing in the URL.

The website then has further instructions such as opening the paper tray, adding A4 or Letter sized paper, installing the 2 ink cartridges the printer comes with, and printing/scanning an alignment test sheet.

Installing the ink is pretty easy. It took me a while to figure out the proper edge to pull to lift the top and access the ink installation area though. It’s an indentation on the right side of the printer, by the way. 

The ink cartridges seem to be pretty small. Don’t forget to pull that little piece of tape off before installing it. 

Printer setup is kind of awful. First of all, you have to install the HP Smart app. This will then try to find the nearby printers, connect to it directly, and then allow you to connect the printer to your local WiFi network which will then make it available to all of the devices on your network as well as let the printer access the internet. The software also asks multiple times if you want to create an account and sign up for a subscription service.  I was also asked to enter a PIN number a few times.  The PIN number can be found on a sticker on the back of the printer. I suppose this is for tracking purchases to make sure you own one of the authorized printers for use with this software. 

Calibration involves printing the above sheet and then putting it into the scanner bed on top and letting the printer scan it to make sure everything is in place. 

After setup completed, I went straight to opening a PDF in Acrobat to print it because that’s the only thing I would use a printer for. However, pressing the print button in the print dialogue just made the whole thing go away. Nothing went into a print queue. Nothing came out of the printer.  Nothing happened at all. It turns out I had to delete the printer from Windows 11 and then add it back in order for printing to work at all.

I really miss the brief moment in time during Windows 10 where printers were literally plug and play for the entire network. I loved it when all I had to do was plug a printer into an ethernet port and power plug, and during the few seconds it took to turn on and walk back to my desk, the printer had already been set up on all Windows PCs connected to the network. Those were the days!

That being said, as soon as I turned another Windows computer on and looked at the printers list while the HP Envy Printer was also on, the printer appeared as being available and completely set up and in working order with no effort at all from me. So at least other devices will have a much easier setup routine when it comes to this printer at least after the first initial network connection and setup is completed. 

Hardware

The printer’s dimensions are: 17.05 x 14.21 x 6.73 in (433 x 361 x 171 mm), its weight is: 13.5lb (6.1kg), and its exterior is all white plastic.

The printer’s design is very asymmetric, but this is a utilitarian device not a decoration. The HP logo is nicely centered on the front with the model name to the right. I thought I’d leave the big sticker on the top with its printer marketing information. 

On the back of the printer there’s a power button and a port for the power plug.  Nothing else!  Well, there’s a sticker that may cover something else but the icons seem to indicate that it is not allowed to be plugged into computers via USB; only WiFi. 

The side view of the HP Envy 6500 series again shows its asymmetry. The latch you can see there is to open the top of the printer in order to change the ink cartridges. 

Also in the top part of the printer is a scanner bed that you can use to scan documents and images. This can also be used as a copier to copy scans directly to new prints using the touch screen interface on the bottom left of the printer.

Software

Once you get through the initial setup, the software is fairly unobtrusive. All Windows programs in all Windows computers connected to the same network as the printer will recognize it and allow you to choose the printer in any software program’s print dialogue. 

The printer has a smartphone-like touch screen interface with menu items for controlling and configuring different parts of the printer. There’s a top-edge swipe hidden gesture to show notifications and if you dig through the menu you’ll also nicely find little animations that show you how to do certain things like open the top and change the printer cartridges, which is very helpful. 

Printing

The print quality is not especially high end and it’s not especially fast either. This is too be expected from a consumer printer in this price range, so if speed or quality are really important, you’re going to want to look for something more expensive. 

Scanning

The HP software required for initial setup also has a “scan” button but pressing that launches into requiring some annoying account set up, so I quickly went looking for another way.

Luckily there’s a “Windows Fax and Scan” software program built into Windows that works totally fine for making use of the scanner aspect of the HP Envy 6500 series.

Purchasing

The HP Envy 6500 Series printer can be found for about $140.  It includes one set of ink cartridges and a coupon to sign up for 3 months of future ink cartridges for free.  It does not include paper. Continuing your ink subscription of course will cost a monthly fee which starts at $1.79/month and goes up to $32/month depending on how often you print. Purchasing ink cartridges individually will cost between $28-$112 depending on what capacity and bundle quantity you choose.  HP says the Instant Ink subscription can save people about 50% over buying the cartridges individually. 

Conclusion

While I’ve spent decades wrestling with printers as a graphic artist, and I certainly had to wrestle with the HP Envy’s setup software, once it was finally all connected to the network and running, the HP Envy 6500 series printer worked quite well. It’s nice to have a scanner in the house again too as I haven’t used one of those since the days of film processing around the turn of the century. Still it will certainly come in handy for digitizing and copying legal documents without having to go to the library to use their copier. 

The HP OmniBook 5 Next Gen AI Laptop looks really nice

I got a little hands-on time with the new HP OmniBook 5 AI laptop the other day and it looks really nice.  First of all, it’s very light at 2.98 pounds.  Secondly, it’s got the world’s longest battery life in a consumer AI PC laptop at about 34 hours of constant video playback. That’s pretty awesome, and it’s due to the Snapdragon X Elite processor with the ARM architecture and Windows Home for ARM operating system. 

This new OmniBook 5 model has a lot of configuration options including the smaller portable 14 inch size as well as a larger 16 inch screen size. The prices range from about $520 to $900 depending on the configuration you choose. The OmniBook 5 is also available with Intel or AMD processors as well, but those are probably going to have less impressive battery life capabilities.

There are also options for 16-32Gb of RAM, 2K OLED display, 1080p IR camera, and HP Audio Boost 2.0 sound. It also has fast USB-C charging that gets you up to 50% in only 30 minutes.

I haven’t heavily tested an ARM based Windows laptop in a long time. It sounds like they are much faster than they used to be with better x64/x86 emulation, and certainly better battery life. 

NVIDIA shows off AI image generation speed on their mobile RTX 5090

We got to see a demonstration of a cool ComfyUI template that NVIDIA created to showcase how quickly their RTX 5090 GPU can process image generation locally on a laptop computer. Most people think we need a high-end server farm in the cloud to do all of these new “Artificial Intelligence” imagery, video, and text generation, but there are numerous smaller models that can actually run locally and can run pretty nicely if you have the proper hardware.

ComfyUI is a node-based interface for creating workflows that interact with various AI models. The latest version gets a performance boost with NVIDIA’s RTX GPUs as well.

NVIDIA’s demo ComfyUI template was set up to take a picture from the web cam, recognize the person in the photo, then use a Stable Diffusion model to create a variety of fictional super hero images and poses of that person.  In addition, the template was programmed to add NVIDIA logos to the corner and also use colors that coordinate with NVIDIA’s branding. 

Generating 6 AI images only took seconds with the amazing NVIDIA RTX 5090 mobile GPU!

I love ComfyUI though it certainly does have a bit of a learning curve and works best with some expensive hardware, but running generative AI models locally can be a lot less expensive and privacy friendly than running them through a cloud subscription service.

If Pavel Durov really believed in the free exchange of information, Telegram wouldn’t exist

Pavel Durov, founder of Telegram, recently tweeted a long post that complains about “What was once the promise of the free exchange of information is being turned into the ultimate tool of control.”  He’s referring to the internet as a whole but may not realize the hypocrisy of his statements. A number of countries are starting to implement laws enforcing privacy violating technologies such as digital IDs (UK), online age checks (Australia), and mass scanning of private messages (EU). This, of course, is going to be bad for the privacy of the people, but it will also be bad for the business plan of Pavel’s Telegram electronic messaging platform.

What was once the promise of the free exchange of information is being turned into the ultimate tool of control.

The hypocrisy here is that Pavel Durov is literally one of the billionaires trying to turn his own proprietary electronic messaging platform into the ultimate tool of control.  The problem is that governments are trying to take that power away from him. 

If Pavel really cared about the free exchange of information and the communications freedom of everyone on the internet, then Telegram wouldn’t exist. A benevolent billionaire who actually cares about freedom of speech, privacy, and security would instead be contributing to and improving upon the open standard communications protocols that comprise the free Internet built for us by our fathers.

If you really want internet freedom, use the open standards

The true purveyors of internet freedom are building free and open protocols at the Internet Engineering Task Force and the World Wide Web Consortium. If Telegram really wanted to support that, they would have used open standard messaging protocols like SMTP or XMPP. Those protocols are designed to be used by anyone for free and with no limitations. Not only that, but they’re also designed to federate with other servers which means the SMTP server that I made myself (How to make your own) can communicate with all of the other SMTP servers out there including the ones used for Gmail, Outlook.com, Office 365, etc.  A Telegram style user interface can easily be applied to any of these standard protocols without having to enslave users into a single centralized server or client application. 

Pavel doesn’t want to do that though because it would mean giving up his control over the users’ communication and thus also giving up control over the ability to abuse & profit from that user base in the future. Telegram is clearly designed for the enshittification business plan (See: Stop being naive when it comes to things like WhatsApp, Telegram, Signal, etc.) and it would be foolish to think that it will end up any differently from all of the others that follow the same path.

Some good examples of software projects that do contribute to and follow the spirit of internet freedom are:

Those 3 electronic messaging systems are designed for complete internet freedom for the users. All three allow for self-hosting and unrestricted communication with no dependencies on a centralized dictator-style authority like Telegram, Signal, iMessage, WhatsApp, and even Google’s RCS do. 

Those projects do also face threats from digital IDs (UK), online age checks (Australia), and mass scanning of private messages (EU) legislation, but they were built in a way that centralized governments would have little to no control over them. 

If everything our forefathers left us (tradition, privacy, sovereignty, the free market, and free speech) is important to you, you’re going to want to invest in the people who are actually supporting those ideals. 

Telegram’s history of dishonesty

Over on Reddit, you’ll find a good collection of references showing Telegram’s poor trust levels.  For example:

2022: Telegram shares users’ data in copyright violation lawsuit 

2024+: Telegram has been quietly sharing user IP addresses and phone numbers with authorities for years, according to CEO Pavel Durov. In a surprising update on Oct. 2, Durov clarified that this disclosure of data from criminal users has been happening since 2018—long before last week’s headlines sparked concern. He emphasized that nothing major has changed in Telegram’s approach, despite what recent news may have suggested. 

Also see:

Photo source: Le Media

There is Such Thing as a Phone That’s Too Thin

Thin is in again.  Apple used to brag about the thinness of the iPhone 5, 6, and now the iPhone Air.   But is there such a thing as being too thin?  I think so.

A smaller surface area is slippery

Usually people hold a phone in a hand with fingers wrapping around the side.  It’s the natural way to hold something, but when something is too thin, there really isn’t enough surface area on the edges to place your fingers for a comfortable grip.  In fact, the thinness contributes to a more slippery grip.  That’s why the blades on ice skates are so thin; the smaller surface area gives you more speed to slide across the ice while scraping the pointy edges against the blade helps you stop or change direction.  Sliding speed not really needed on a phone and scraping a blade against my skin doesn’t sound that comfortable.  The iPod Touch in the photo above has very thin edges and it’s not comfortable to hold at all (unless I keep my hand flat and perpendicular to gravity.) 

Thicker is easier to hold

On the other hand, something thicker and more ergonomically designed, like our favorite Unihertz Jelly Star, is much more comfortable to hold.  The Jelly Star’s jellybean smooth rounded yet thick shape make for a perfect fit for your fingers and the whole thing is curved to fit comfortably within the palm of your hand. It’s a much more secure, comfortable, and ergonomic shape for a mobile phone that you hold in your hand. 

Ice Skate Picture: MomMag

WhatsApp’s 2025 Ad Campaign is probably a lie. Here’s how to tell. UPDATE: It is a lie.

UPDATE Oct 2, 2025

It turns out all of Whatsapp’s privacy claims are lies just as predicted. This week a lawsuit was filed by an ex-employee who discovered numerous privacy and security compliance violations including the fact that 1,500 WhatsApp engineers had unrestricted access to user data, including sensitive personal information. See:

Whatsapp is also suffering from numerous other security vulnerabilities this week such as:

July 3, 2025

In the years since WhatsApp launched, I haven’t seen any marketing at all in the U.S.A.  That’s changed in 2025 as Facebook/Meta has started promoting the messaging app with a new ad campaign (1) (2).  Personally, I deleted the app over 10 years ago because it was obviously designed for enshittification from the beginning and that abusive business plan became more obvious when Facebook bought Whatsapp in 2014. The new ad campaign mainly talks about private messages being private and how they’re all “end-to-end encrypted”, but end-to-end encryption doesn’t mean a whole lot when one company owns both ends. 

Elon Musk told his 250 million X followers that they shouldn’t trust WhatsApp, because parent company Meta, exports data from the messaging platform for targeted advertising. Meta and Facebook are going to deny that, and there’s no proof either way, but Whatsapp did change their policies in 2021 to allow sharing data.

There are a lot of reasons not to trust Whatsapp though.

There’s no proof

The biggest red flag when it comes to privacy and security in tech products is when the company that makes the product doesn’t allow you to reproduce or audit its functions in order to verify that the product does what the company says it does. There isn’t really much regulation for tech products, so they can pretty much say what they want to say. That’s how we get companies like Apple who spew out “reality distortion field” claims and made-up buzzwords all the time. No one is held accountable because no one is allowed to audit the claims.

Closed source

That’s a factor of “closed source” software where the exact functions of tech products are hidden due to businesses wanting to keep their secrets away from competitors. That sounds like a good idea for competition, but it also allows companies to secretly do things that they probably shouldn’t be doing… such as abusing users. 

Open-source software is the opposite. This type of code is published on the internet for anybody to read through, audit, reproduce, test, critique, and contribute to. We even have standards bodies like the W3C and IETF that openly develop and evolve protocols that anyone can use and contribute to in a democratic manner. 

Centralized for dictator-style control

Another aspect of closed-source tech and sometimes even open-source tech is a structure for centralized control.  This is when there is one server or location that everything else depends on. No one else is allowed to run the system. No one else is allowed to connect to the system without authorization.  No one else is allowed to contribute to the system or add democratic features.  It’s basically a dictatorship where only one entity gets to decide how everything works and you’re a slave to whatever their decisions are. That type of system is known to always become corrupt someday no matter how benevolent the dictator may be at one point or another. 

Use open standards instead

The smarter thing to do, especially when it comes to personal and business communications, is to depend on open standards. We built the internet on open standard protocols for the big reason of encouraging democratic collaboration and to avoid dictator-style control and corruption. I guess a lot of people don’t understand the advantage of avoiding becoming slaves to a single dictatorship.  Anyway, the IETF has specifications for several completely open messaging protocols like SMTP and XMPP. SMTP is the most popular messaging protocol anywhere on the internet and it’s completely open for anyone to use.  If you don’t recognize SMTP, it’s one of the protocols for email transfer.  

It’s very easy to make your own fully open, democratic, and self-controlled SMTP email server with lots of extra security and end-to-end encryption in a very low-cost manner as well. You could host maybe 10,000 people on a server with 1Gb of RAM that might cost $10/year.  See: Using Delta Chat with Chatmail servers for decentralized, open, secure, private messaging and 10 Ways Delta Chat is Better than WhatsApp, Signal, and Telegram.

Unfortunately there are no advertisements or marketing budgets for open protocols, so gullible people are easily steered away so that they can be taken advantage of.

Also see:

Wacom Movink Review: the thinnest and maybe best pen display ever

I’ve been using Wacom tablets for computer graphics since I could afford the cheapest one they made in 1997 as a broke college student. Since then, I’ve used many graphics tablets, tablet PCs, and pen tablet displays. Wacom is still the industry standard, and still my favorite, and now I’ve been able to test their latest innovative pen display; the Wacom Movink. This one is a significant departure from the thick and heavy pen displays that I’m used to.  It’s ridiculously thin and light, yet still seems to have all of the accuracy, control, and precision that I’ve come to expect from Wacom pen displays and tablets. Let’s take a closer look at what might be the most innovative Wacom product to arrive since the Wacom Mobile Studio Pro. 

The Wacom Movink can be purchased from the Wacom online store for $699 USD.

What’s in the Box

The Movink is very slim on accessories when it comes to what’s included. Other pen displays tend to come with power cables, data cables, 3-to-1 cables, pen holders, stands, etc., but the Wacom Movink is just the very thin and light pen display, a single USB-C wire, a stylus, and an instructions booklet. That’s it! Sure, I do kind of wish it came with some sort of stylus holder, a carrying case, and maybe even a drawing glove and cleaning cloth, but those things cost extra and I’m sure Wacom wanted to keep the costs of the main product down so that you can decide what other accessories you might want separately. Those type of accessories are available from the Wacom Store though.

Hardware

The hardware is pretty gorgeous. It’s a 13.3 inch OLED screen with DCI-P3 100% (CIE 1931) and Adobe RGB 95% (CIE 1931) color gamut support and Pantone validated certifications. It also has a 100,000:1 contrast ratio and 170° (85° /85°) H, 170° (85° /85°) V viewing angles. The full dimensions are 319.5 x 205.2 x 4 ~6.6 mm (12.6 x 8.1 x 0.16 ~ 0.26 in) with an active display area of 294 x 165 mm (11.6 x 6.5 in). 

The Movink is crazy thin and light at 4 mm (0.16 in) and 420 g (14.8 oz). I can easily hold it like a clipboard with one hand and interact with it using the pen in the other hand. It is so comfortable to use this way except that you need the wire to be plugged into a decently powerful computer.

There are hidden bezel touch sensitive programmable buttons on both the left and right bezels kind of close to the top where the USB-C ports are. They’re invisible buttons and there’s no tactile way of feeling for them.  That’s good if you don’t want to look at these buttons, but it’s really bad if you want to actually use these buttons. Making them raised or textured would obviously detract from the look of the Movink pen display, but making them invisible and un-feel-able certainly detracts from the usability. 

The left side has a USB-C port and customizable button just below it. 

The right side has the same combination of USB-C port and customizable hardware button. Either side can be used to plug the pen display into a computer so whichever side is more comfortable is perfectly acceptable.

There’s a nice groove on both side edges below the buttons too. I’m not sure if there’s a functional purpose to that, but I kind of wish that it could act as a pen holder.  If there were some magnets there and a bit of metal in the pen barrel, it would be so nice to just stick the pen to the edge there when not in use. Instead I have to put the pen behind my ear or lay it on the desk where it can roll away and get lost. 

The back is totally smooth with only a Movink logo and two rubber strips for gripping the table. It does attract fingerprints a bit, but that’s ok. 

The OLED display is nicely matte coated for hardly any glare as well. This is super important to me as I hate working with Macs that have huge reflections that interfere with the visibility of what I’m supposed to be working on. 

The Wacom Pro Pen 3

The Movink comes with a thin Wacom Pro Pen 3 which is a lot thinner than the Pro Pen 2. 

The Wacom Pro Pen 3 nicely has three buttons on the barrel. The center one has a small protrusion so that it feels different than the others. This is very important for tactile feedback and muscle memory as it lets you easily recognize which button is which just by feeling it with your fingers while holding the pen.

While older Wacom pens always had removable and replaceable tips, the Pro Pen 3 includes them inside the back of the pen. Just unscrew the back and there are a few different texture/softness and replacement nib options.

The Pro Pen 3 feels great and we get perfect alignment with the screen when doing retouching and digital artistry work.

The Wacom Pro Pen 3 is a lot thinner than the Pro Pen 2, but I kind of like the thicker one with a soft rubber grip a bit better. The thicker one also rolls in a circle due to its different widths at each end, while the new Pro Pen 3 is equal width along its entire length which causes it to roll in a straight line… right off your desk and underneath the bookcase where you’ll never see it again. 

Hardware controls

The Wacom Movink has some display settings and configuration options built right into the hardware.  You can see the above configuration overlay that appears when pressing one of the side tablet buttons by default. 

The tablet buttons on the left and right side can be configured here though.  One of them is required to launch this hardware configuration menu, but you can configure the other one to do something else like toggle the touch screen on/off or assign an ExpressKey which is programmable in the Wacom software. With that, you can set it to do practically anything, including context sensitive functions that change depending on which software program you’re running in the foreground at the time. 

If you need to manually set which USB-C plug is the display port, you can do that with the above “Input Source” menu, but “Auto” is probably going to work fine.

The “Display Settings” menu has a lot of color tweaking and brightness configuration options. This is great to have built into the hardware without having to rely on the operating system for.

The “Other Settings” section has a few extra configuration options such as language, menu transparency, LED luminance, pen side switch, power button options, boot logo on/off and even a Factory Reset option.

Software

You’re going to want to install the Wacom drivers software on your computer before plugging the Movink into it. It will probably work without the software, but the software has tons of excellent features and options that you’re going to want to take advantage of.

The on-boarding welcome screen walks you through a lot of the features available in the Movink. This is just a slideshow with text and illustrations outlining all of the features. It even mentions turning off “Windows Ink” if that messes with the pressure sensitivity in some of your programs. That’s something I always have to do and it’s easy to configure which programs use the “Windows Ink” drivers and which use the superior (yet older) Wacom WinTab drivers. 

After you get through the welcome screens, the real meat of the Wacom driver software becomes available. If you’ve ever used a Wacom pen display or Wacom graphics tablet before, all of the hugely robust customization options are here. The interface has changed a bit over the years, but the functionality is still excellent. You can customize the functions for every button on the device and pen. There’s the bezel touch buttons, the hardware physical edge buttons, the Pro Pen 3 barrel buttons, and even touch screen gestures. You can also create custom on screen menus with grids of buttons or radial menus. The radial menus are great for the pen interface since when the circular menu appears beneath the pen pointer, you have a very short distance to move the pen in order to activate the menu item you want.  Grid style custom menus are better for the edges near the bezel where your fingers might be such that you can simply touch the button you want with minimal effort.

Customization options are hugely robust. You can create different sets of customizations depending on which application program is active as well. In other words, I can create specific shortcuts and hardware key functions for when I’m using Adobe Premiere for example, and then a completely different set of functions when I’m using Blender, or Photoshop, or Illustrator. Types of express key and menu customization functions are hugely diverse as well.  You can assign modifier keys, keyboard shortcuts, scrolling/zooming/panning functions, tool switching, display switching,… just about anything.  

When it comes to graphics software, the Movink and its software works really well. Sometimes the touch screen activates too often when resting my hand against the display even with a drawing glove, but this is easy to fix with the touch on/off toggle button. 

How well the graphics software performs is going to be a factor of what kind of computer you’ve got the Movink pen display hooked up to, of course. That’s another advantage of having a pen tablet display that’s separate from the computing hardware; you can plug it in to any kind of specs that you want. If you need to be mobile, you can plug it into a lightweight laptop. If you need huge amounts of graphics processing power, you can plug it into a high end workstation in the office. 

Pros/Cons

Pros

  • Incredibly thin and light pen display is so comfortable to hold and use
  • Gorgeous OLED display with excellent color reproduction
  • Only 1 wire needed to connect to a PC/Laptop
  • Wacom software provides hugely robust customization options
  • Programmable express keys for improving your work efficiency
  • Excellent pen accuracy, feel, and performance
  • Sturdy build quality

Cons

  • Touch screen may be too sensitive to be blocked by drawing gloves (but it’s easy to turn off)
  • Customizable touch panel buttons don’t line up with touch areas if the display area is smaller than the Movink’s native display area
  • Does not come with a pen holder, stand, or case
  • Touch sensitive programmable bezel buttons are hard to locate (no tactile or visual feedback)
  • No magnetic edges to place pen when not in use
  • Pro Pen 3 is an equal diameter cylinder which means it rolls in a straight line thus making it easier to travel long distances and get lost under furniture
  • Requires a computer with USB-C display port

Conclusion

In use, the Wacom Movink feels a lot like the more expensive Wacom Cintiq Pro pen displays, but it is far far more portable! The Movink can easily stack against your closed laptop lid and slide into your laptop bag for easy mobility… and then also easily plug into your office workstation for higher performance graphics processing. It’s the best mobile pen display tablet I’ve ever used. If only its display/data connection to a computer could be wireless, but I don’t think that will happen for a while. 


Guest model appearance by Brana Dane.

B&H’s Bild Expo picks up where Photo Plus Expo left off

The Bild Expo first started in September of 2023 as a big 50th anniversary for the B&H Photography & Video super store. After attending that, I figured it was just a one-time event for the photography store’s big birthday, but in 2025 a second Bild Expo was scheduled.  It was actually even bigger than the previous one two years ago.

It is great to see that maybe a new big photography expo will regularly come back to New York City and the Javits center again. Before the pandemic, we had the PDN Photo Plus expo every year. The Photo Plus expo started in 1983 and lasted until 2019. The 2020 Photo Plus expo was cancelled due to the Covid 19 pandemic and never returned. 

So let’s take a look at the BILD 2025 expo and see how it went.

The line to get into the Javits on the first day of BILD 2025 was actually very long; going all the way down the length of the Javits Center and then around the block. Thankfully, the QR code scanning and badge printing went very quickly though, so waiting/walking through the line wasn’t so bad at all. 

There was a huge variety of speaker presentations available to attend in the upstairs area of the north wing of the Javitts. Some were geared towards social media influencer tips as well.  Although, I don’t think they really provided much value. Big influencers don’t really seem to know exactly how or why they became influencers and think that anybody can just post anything they want and they’ll easily obtain a following. 

This presentation was about “Mastering the Visual Hook“, but the speakers (James Tralie, Producer and Animator at NASA and Grace Wells, Commercial Creator and Filmmaker) couldn’t even describe what a visual hook is nor did they provide any examples whatsoever on the huge video screen behind them. 

The Smoke Genie booth had a very cool little handheld smoke and bubble generator for special video and photo effects. 

I love that there were several PC manufacturer booths at the exhibit floor.  I got to see the above high-end Asus Strix gaming laptop which was very cool with its animated RGB lights on the back of the lid. Lenovo, Microsoft, and Wacom were showing off some great creative professional computing hardware as well. 

Dell had a model and studio set up at their booth too! Above is actress Jolynn Carpenter.

Minnie Lee was nicely modeling at another exhibit booth. 


The Nikon booth was pretty awesome. One staff member was actually giving out 32Gb SD cards that we could insert into each of the cameras on display, take as many photos as we wanted, and then take the SD card out, repeat with another camera, and take it home when done. I even recognized one of the models as someone I had worked with before: Tatjana Sinkevica.

Adobe had a nice exhibit booth set up as well where various speakers would give demos on photo editing techniques showcasing different Adobe software programs. 

I hope that this B&H BILD expo becomes an annual occurrence as it was a very fun event with lots of great photography products and information to see.